Author: StephenH
Subject: ouR escaPOD mods
Posted: 20 Oct 2016 at 10:48pm
Here's another fix to a Forest River "What were they thinking?" situation. I had wondered why the water pump with its winterization valve and hose were put in a place that could not be reached without removing the whole bed platform. While I had previously modified the bed to give better access to the water heater, I had neglected to address the problem of access to the water pump. I didn't want to have to remove the mattress and remove the whole platform to work with the water pump.
My answer: Install an access hatch. I still need to move the mattress, but I can hold it up or fold it over in order to access the new hatch I made. Since I had previously installed hinges, I removed the screws holding the back part of the platform in place and folded it over to get it out of the way I had removed screws from the hinge, thinking I would need to do so to cut the platform. It turns out I did not need to do so, which will become clear later.
Steps:
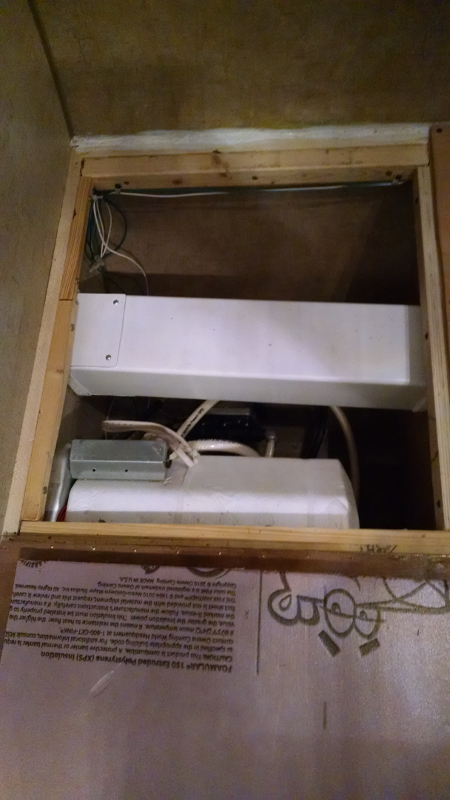
1. Fold back half of the platform over the front part, allowing access to the water pump.
2. Using cleat stock or scrap lumber, add additional wood to the perimeter of the opening to provide more support for the hatch. Unfasten wire anchors as needed and cut notches as needed so it fits over the existing screw heads so it can be tight against the original frame.
2. I used an oscillating tool with a wood/metal blade to cut through the hinge and the platform just where the hinge was plus a little more. I did not cut the whole length as I wanted to draw a cutting line. After figuring out where the wood needed to be cut to rest properly, I used a straight-edge to mark the line and cut it to meet up with the cut I made previously.
3. With the line cut, I made sure the new hatch would open and close without hitting the window shade. Then I took the insulation which I had previously removed from the opening and fit it to the resized opening. I then used Locktite construction adhesive to glue the insulation to the hatch lid.
![]()
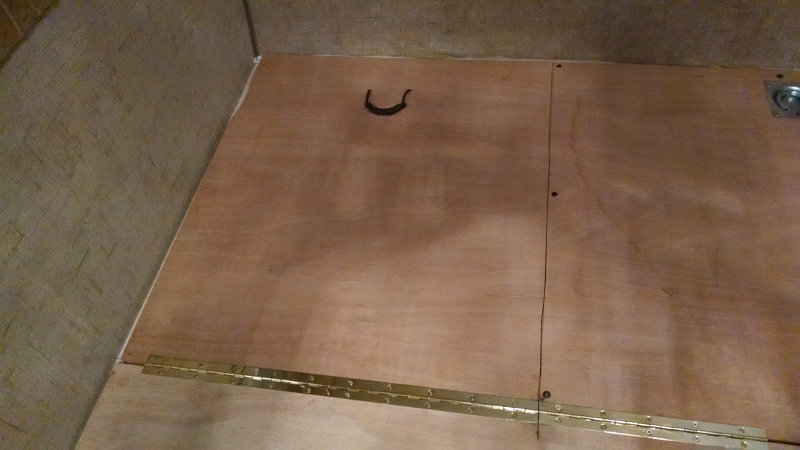
I left the project overnight so the glue could cure. The last step was figuring out how to open the hatch without having a bulky pull. I wanted something that would be relatively flat. I had an old shoelace from a worn-out pair of hiking shoes. I did some creative folding and wrapping to make a handle with extra lace hanging out from each end. I sealed it with glue so it would not come undone. I drilled two holes and fed the lace ends through. Then I brought the ends together and tied them in a square knot. Now I have a hatch through which I can access the water pump. The other side of the platform did not need to open now. It has the handle I had put in if I needed to open the whole back end of the platform. Since I did not want to leave a hole, I left the handle in place. I did use screws to permanently attach that part of the platform after using some glue to fix the insulation which had started to fall through to the basement storage.
The finished hatch looks like this:
![]()
I'll see how well it works when I go to winterize the R-Pod. That won't happen until after it gets more toward winter. We will be making a short camping trip first.
Subject: ouR escaPOD mods
Posted: 20 Oct 2016 at 10:48pm
Here's another fix to a Forest River "What were they thinking?" situation. I had wondered why the water pump with its winterization valve and hose were put in a place that could not be reached without removing the whole bed platform. While I had previously modified the bed to give better access to the water heater, I had neglected to address the problem of access to the water pump. I didn't want to have to remove the mattress and remove the whole platform to work with the water pump.
My answer: Install an access hatch. I still need to move the mattress, but I can hold it up or fold it over in order to access the new hatch I made. Since I had previously installed hinges, I removed the screws holding the back part of the platform in place and folded it over to get it out of the way I had removed screws from the hinge, thinking I would need to do so to cut the platform. It turns out I did not need to do so, which will become clear later.
Steps:
1. Fold back half of the platform over the front part, allowing access to the water pump.
2. Using cleat stock or scrap lumber, add additional wood to the perimeter of the opening to provide more support for the hatch. Unfasten wire anchors as needed and cut notches as needed so it fits over the existing screw heads so it can be tight against the original frame.
2. I used an oscillating tool with a wood/metal blade to cut through the hinge and the platform just where the hinge was plus a little more. I did not cut the whole length as I wanted to draw a cutting line. After figuring out where the wood needed to be cut to rest properly, I used a straight-edge to mark the line and cut it to meet up with the cut I made previously.
3. With the line cut, I made sure the new hatch would open and close without hitting the window shade. Then I took the insulation which I had previously removed from the opening and fit it to the resized opening. I then used Locktite construction adhesive to glue the insulation to the hatch lid.
I left the project overnight so the glue could cure. The last step was figuring out how to open the hatch without having a bulky pull. I wanted something that would be relatively flat. I had an old shoelace from a worn-out pair of hiking shoes. I did some creative folding and wrapping to make a handle with extra lace hanging out from each end. I sealed it with glue so it would not come undone. I drilled two holes and fed the lace ends through. Then I brought the ends together and tied them in a square knot. Now I have a hatch through which I can access the water pump. The other side of the platform did not need to open now. It has the handle I had put in if I needed to open the whole back end of the platform. Since I did not want to leave a hole, I left the handle in place. I did use screws to permanently attach that part of the platform after using some glue to fix the insulation which had started to fall through to the basement storage.
The finished hatch looks like this:
I'll see how well it works when I go to winterize the R-Pod. That won't happen until after it gets more toward winter. We will be making a short camping trip first.