Author: StephenH
Subject: ouR escaPOD mods
Posted: 17 Jun 2016 at 4:14pm
Here is one I just completed. I wondered why Forest River left so much room behind the drawers beneath the sink in our 179. It did not seem to make sense to have so much wasted space. I decided to do something about it.
I really could not do much with the top drawer as the sink drain would interfere with making the top drawer any larger. I modified the middle and bottom drawer, adding 3 inches in depth to both of them. I disassembled them and reused the front and back of the drawer pieces. I could not find 3/8" plywood, so I got 1/2" plywood and notched it so that the total width of the drawer would remain the same. My table saw came in handy for this project as well as a pneumatic nail gun. Since I could not reuse the drawer bottoms, I used 1/4" Lauan plywood. I used carpenter's glue in addition to the nails on the corners. Since I reused the front and back, I did not have to worry about placement of the screw holes for the faceplate.
For the slides, I realized that the original holes would place the mounting screws near the faceplate and in the middle of the drawer, leaving the back end unsupported. I drilled a hole in the slide parts that attach to the drawers near the back. I used some extra screws to place one in the middle where the original screws would have been. This should provide better support for the drawer and increased strength.
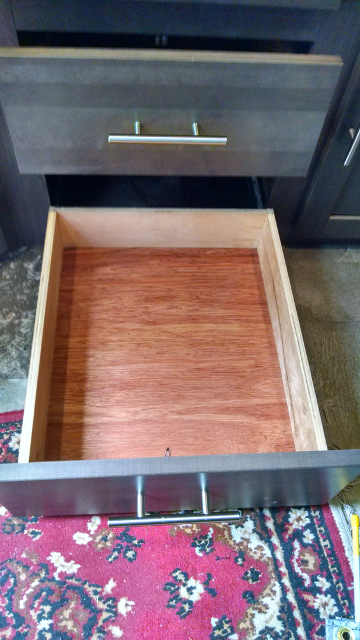
Here's a picture of the bottom drawer. The middle drawer is the same. Both are 3" longer than the original drawers.
![]()
The drawers were finished with 3 coats of Minwax semi-gloss clear polyurethane spray. They are getting their 24 hours of rest now before loading them up.
Subject: ouR escaPOD mods
Posted: 17 Jun 2016 at 4:14pm
Here is one I just completed. I wondered why Forest River left so much room behind the drawers beneath the sink in our 179. It did not seem to make sense to have so much wasted space. I decided to do something about it.
I really could not do much with the top drawer as the sink drain would interfere with making the top drawer any larger. I modified the middle and bottom drawer, adding 3 inches in depth to both of them. I disassembled them and reused the front and back of the drawer pieces. I could not find 3/8" plywood, so I got 1/2" plywood and notched it so that the total width of the drawer would remain the same. My table saw came in handy for this project as well as a pneumatic nail gun. Since I could not reuse the drawer bottoms, I used 1/4" Lauan plywood. I used carpenter's glue in addition to the nails on the corners. Since I reused the front and back, I did not have to worry about placement of the screw holes for the faceplate.
For the slides, I realized that the original holes would place the mounting screws near the faceplate and in the middle of the drawer, leaving the back end unsupported. I drilled a hole in the slide parts that attach to the drawers near the back. I used some extra screws to place one in the middle where the original screws would have been. This should provide better support for the drawer and increased strength.
Here's a picture of the bottom drawer. The middle drawer is the same. Both are 3" longer than the original drawers.
The drawers were finished with 3 coats of Minwax semi-gloss clear polyurethane spray. They are getting their 24 hours of rest now before loading them up.